The Battle
After the skirmishes around Clay Hill on 26 October 1644, the parliamentarian generals resolved on an ambitious plan to attack the royalists. Sir William Waller would take the earl of Essex’s infantry, the London militia regiments and about two thirds of the cavalry from the combined armies to attack the royalist position from the west following a night march via Hermitage, Winterbourne and Boxford. Once in position Waller would fire his cannon, which would signal that Manchester with the rest of the army should fall onto the east side of the royalist position from the slopes of Clay Hill.
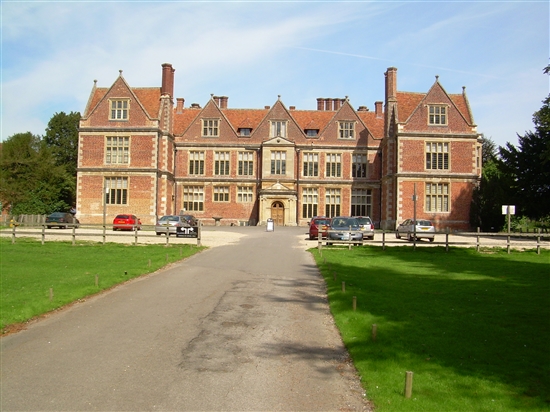
The royalists had deployed to use the ground to the best of their advantage. In the east and north Shaw House and Donnington Castle were both occupied for defence. These positions were manned by the Oxford infantry and the Donnington garrison under Sir John Boys. Most of the royalist horse was positioned in the fields of Speenhamland north of Newbury to act as a mobile reserve to counter any parliamentarian breakthrough. In the west Prince Maurice’s foot and some of his horse were deployed to defend the village of Speen. Where the enclosed fields to the west of Speen opened into the heath land beyond, the royalists constructed a defensive work.
Overnight 26-27 October Waller’s forces undertook their march. According to Walker, they were discovered by the garrison at Donnington, but, despite a mixed royalist force of infantry and cavalry numbering about 500 being sent to intercept them and defend the Lambourne crossing at Boxford, the parliamentarians managed to cross the river and advanced on Speen through Stockcross. But is was not until 3pm that Waller’s forces were in a position to attack and little time remained on the late October day before night began to fall.
On the eastern side of the battlefield early on the morning of 27 October, Manchester had sent forward a forlorn hope of either 400 or 1,000 men (depending on whether parliamentarian or royalist accounts are believed) to take a crossing of the Lambourne, probably at Ham Mill near to where the river joins the Kennet. The purpose of this attack was to draw royalist forces away from Speen in advance of Waller’s attack. Undetected by the royalists, Manchester’s forlorn hope, along with two other bodies of his foot in support advanced toward Shaw bridge, where they drove off the defenders, but were then repulsed in a sharp exchange by 400 men from Sir Bernard Astley’s brigade and forced to flee; many reportedly drowning in the river. The sources are then silent on Manchester's activity that day until late in the afternoon.
Waller's force in the west deployed in a tightly packed battle formation with cavalry on the wings and infantry in the centre between the river Lambourne and the enclosures which adjoined the northern bank of the river Kennet, a distance of around 1.6 kilometres at its widest; further to the east the distance narrowed as the Lambourne flowed toward its confluence with the Kennet. Wickham Heath covered most of the ground over which the army advanced. Sir William Balfour commanded the parliamentarian right wing of cavalry consisting of around 1,400 of the earl of Essex's cavalry and the earl of Manchester's own regiment of horse. Whether Lt General Cromwell or Lt General Middleton command the parliamentarian left wing, consisting of the rest of the earl of Manchester's and Sir William Waller's cavalry is unclear. Waller also seems to have fought on that side of the battlefield and the lack of clarity about overall command and control may in part be responsible for the poor performance of the horse there. Major General Philip Skippon was in charge of the infantry in the centre. The earl of Essex's regiment was on the right with three London militia regiments. Three regiments of Colonel Henry Barclay's brigade formed the left. The second line reserve in the centre was made-up of the four foot regiments of Colonel Edward Aldrich's brigade and another London militia regiment. Before the main formation 800 musketeers had been drawn out to form a forlorn hope.
Facing them were the infantry and cavalry of Prince Maurice's army with the Duke of York's foot regiment. These units had thrown-up defensive works to the west of Speen and were supported with five 'small peeces', probably 3 pounder drakes or 6 pounder sakers. Skippon said that the earl of Essex's infantry regiment attacked Speen on the right whilst Colonel Aldrich's brigade assaulted the royalist defensive works, suggesting that the reserve line had moved into the front line to make the attack, with Barclay's brigade moving forward further to the left with the cavalry there. The small brigade of cavalry of Prince Maurice's army appears to have tried to attack the advancing parliamentarians upon the heath, but was forced to withdraw. The horse on the parliamentarian left were disrupted as they advanced through hedged and ditched enclosures. The earl of Cleveland's royalist brigade of horse, which was part of the King's reserve on the western side of Speenhamland, saw the threat posed by this advance and attacked this part of the parliamentarian line. Cromwell and Waller's cavalry were pushed back as they advanced and Cleveland's men pressed on toward the infantry in Barclay's brigade, who were put to a stand, but eventually overcame Cleveland's men and captured the Earl. Despite reinforcement from the royalist reserve, after around one hour of fighting those defending Speen were pushed back to the edge of the enclosures on the eastern side of the village next to Speenhamland.
South of the village 500 cavalry with 100 musketeers on the parliamentarian right wing under Sir William Balfour had been attempting to work their way past the royalists on Speen hill along the modern Moor Lane and into the open field of Speenhamland, part of which is now Goldwell Park. This they achieved and came close to capturing the King before being intercepted by the 800 cavalry of Sir Humphrey Bennett's brigade supported by the King's Lifeguard of horse and some troops from the Queen's regiment of horse. The royalists drove the parliamentarians back about half a mile, killing most of the musketeers and some of the cavalry. By now it was well after 4:30pm and, as the light was fading quickly, on this side the of battlefield fighting began to die down.
In the east the 1,200 royalist Oxford infantry under Sir Richard Page and Colonel Anthony Thelwall were deployed on the north side of the river Lambourne in and around Shaw House and the surrounding enclosed fields. These troops had prepared their position with defensive works. Farther back, on Speenhamland, was the remainder of the royalist infantry and cavalry acting as a reserve to reinforce either the western or eastern side of the royalist position and benefiting from the short internal lines of communication.
The parliamentarian battle plan called for the earl of Manchester to attack with his 1,500 horse and 3,700 infantry once Waller had launched the assault in the west. Manchester clearly delayed the attack and didn't commence his advance down Clay Hill until after 4:00pm, possibly because of a desire to be certain matters were going Parliament's way given the mauling his troops had experienced earlier in the day. Advancing with a forlorn of 500 commanded musketeers and a pair of light cannon, Manchester's forces made good progress initially, driving in the royalist defenders in the fields around Shaw House and the village and capturing one of the royalist defensive works. An intervention by the royalist horse of the Prince of Wales' regiment in the fields about the house was repulsed by the parliamentarians. But the withering fire from those defending the gardens of the house forced the attacking parliamentarians to face about at which point they were attacked again by the Prince of Wales' regiment, supported by some of Thelwall's infantry, and routed. Pursuing the parliamentarians the royalists captured the pair of light cannon and regained the ground on which they had initially deployed. The parliamentarians were pursued by the royalist cavalry back on to Clay Hill and, apart from a failed attempt by Manchester's horse to recapture their light guns, fighting in the east stopped.


